
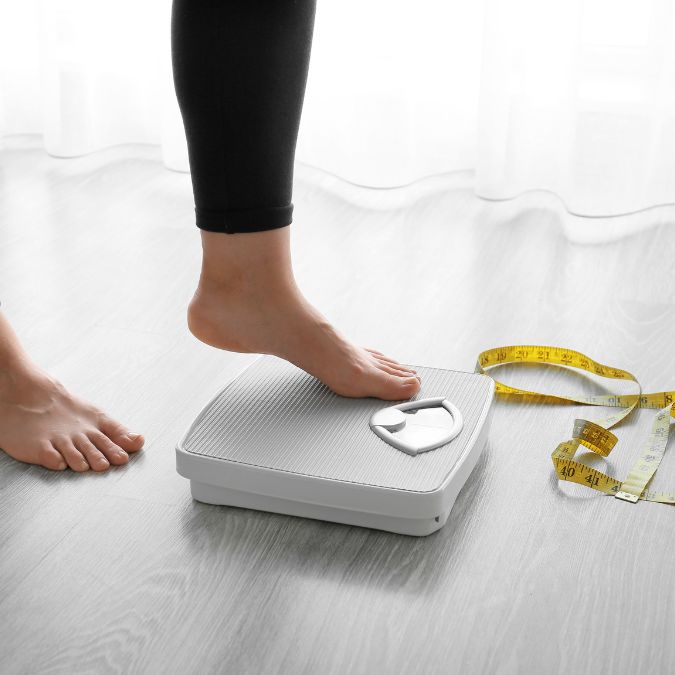
Yoga for Weight Loss: Effective Poses and Practices
It´s all about Yoga for weight loss – poses and practices. While many people identify yoga with flexibility and relaxation, it is also an effective weight-loss activity. In this article, we’ll look at the benefits of yoga for weight loss and go over some of the most beneficial poses and practices to include in your regimen.
Understanding the Relationship Between Yoga and Weight Loss:
Yoga is a comprehensive approach to wellbeing that addresses both the physical and emotional elements of weight loss. Yoga, unlike other types of exercise that only focus on burning calories, benefits in a variety of ways. It encourages mindfulness, reduces stress, and enhances general well-being, all of which are necessary for maintaining a healthy weight.
Yoga Poses for Weight Loss:
Sun Salutations, also known as Surya Namaskar in Sanskrit, are a series of yoga positions used at the start of a yoga practice to warm up the body and create a sensation of flow. It is an exciting and dynamic routine that blends movement, breath, and awareness.
The Sun Salutations sequence is normally made up of 12 positions, each of which is coordinated with inhaling or exhaling. It varies slightly based on the style of yoga and the instructor’s preferences, but the essence is the same.
Here is a breakdown of the common poses included in Sun Salutations:
1. Mountain Pose (Tadasana): Begin by standing tall with feet together, spine straight, and palms together at the heart center. Take a moment to ground yourself and establish a steady breath.
2. Upward Salute (Urdhva Hastasana): Inhale and extend the arms overhead, reaching towards the sky. Lift the chest and gaze upwards, lengthening the spine.
3. Standing Forward Fold (Uttanasana): Exhale and hinge at the hips, folding forward from the waist. Let the hands touch the floor or reach for the shins, allowing the head to relax towards the legs.
4. Halfway Lift (Ardha Uttanasana): Inhale and lift the torso halfway up, lengthening the spine and bringing the hands to the shins or thighs. Keep the gaze forward and the shoulders away from the ears.
5. Plank Pose (Phalakasana): Exhale and step or jump back into a high plank position. Align the wrists under the shoulders, engage the core, and maintain a straight line from head to heels.
6. Chaturanga Dandasana: From the plank pose, exhale and lower the body halfway down, keeping the elbows close to the ribs. This pose is sometimes referred to as a low push-up.
7. Upward-Facing Dog (Urdhva Mukha Svanasana): Inhale and lift the chest, rolling over the toes and arching the back. The palms, tops of the feet, and thighs are the only points of contact with the mat.
8. Downward-Facing Dog (Adho Mukha Svanasana): Exhale and lift the hips up and back, forming an inverted V shape with the body. Press the palms into the mat, lengthen the spine, and engage the legs.
9. Halfway Lift (Ardha Uttanasana): Inhale and step or hop the feet forward between the hands, returning to the halfway lift position.
10. Standing Forward Fold (Uttanasana): Exhale and fold forward, bringing the torso closer to the legs.
11. Upward Salute (Urdhva Hastasana): Inhale and rise up, extending the arms overhead and lifting the chest.
12. Mountain Pose (Tadasana): Exhale and return to the starting position, with palms together at the heart center.
This completes one round of Sun Salutations. It is common to repeat the sequence several times, linking each pose with the breath, to create a seamless flow of movement and energy.
Sun Salutations are known for their ability to warm up the body, increase flexibility, strengthen the muscles, improve circulation, and enhance focus and concentration. They are a great way to start a yoga practice and can be modified to suit different levels of experience and physical abilities.
Warrior I, II, and III poses are powerful standing poses that strengthen the legs, core, and arms. By holding these poses, you engage multiple muscle groups, which helps build strength and burn calories.
Warrior I:
Warrior I, also known as Virabhadrasana I in Sanskrit, is a strong standing yoga posture that is frequently included in yoga sequences due to its strengthening and grounding properties. It is named after Hindu mythology’s fearsome warrior Virabhadra. Warrior I focuses on the legs, hips, and core while also encouraging balance and focus.
Here is a step-by-step guide to performing Warrior I:
1. Start in a standing position at the top of your mat, with your feet hip-width apart and arms by your sides.
2. Take a big step back with your left foot, turning it out at a 45-degree angle. Your left heel should be aligned with the arch of your right foot.
3. Bend your right knee, making sure it is directly above your right ankle. Keep your right thigh parallel to the floor and your shin perpendicular.
4. As you bend your right knee, raise your arms overhead, reaching towards the sky. Keep your palms facing each other or bring your hands together in a prayer position.
5. Lengthen your spine and engage your core muscles to support your posture. Draw your shoulder blades down and back, opening your chest.
6. Keep your gaze forward, or if comfortable, look up towards your hands.
7. Hold the pose for several breaths, feeling the strength and stability in your legs and the grounding energy through your feet.
8. To release, exhale, and lower your arms, straighten your right leg, and step your left foot forward to return to the starting position.
9. Repeat the same steps on the other side, stepping your right foot back and bending your left knee.
Warrior I strengthens and stretches the legs, focusing on the quadriceps, hamstrings, and calves. It also promotes flexibility and better posture by opening the hips, chest, and shoulders. Warrior I also improves balance, stability, and attention, delivering a sense of inner power and confidence.
Changes can be made to accommodate varying levels of flexibility and balance. For example, if you have trouble keeping your back heel anchored, you might support it with a folded blanket or yoga block. If you feel any pain in your lower back, shorten your stance or rotate your rear foot outward slightly.
Always listen to your body and practice in your comfort zone. Warrior I can help you create strength, stability, and a sense of groundedness both on and off the mat with consistent practice.
Warrior II
Warrior II, also known as Virabhadrasana II in Sanskrit, is a basic standing yoga pose that improves strength, stability, and concentration. This position, like Warrior I, is named after Hindu mythology’s ferocious warrior Virabhadra. Warrior II focuses on the legs, hips, and core, as well as increasing balance and opening the chest and shoulders.
Here is a step-by-step guide to performing Warrior II:
1. Start in a standing position at the top of your mat, with your feet hip-width apart and arms by your sides.
2. Take a big step back with your left foot, turning it out at a 90-degree angle. Your left foot should be perpendicular to your right foot.
3. Align your right heel with the arch of your left foot, creating a straight line from heel to heel.
4. Bend your right knee, ensuring it is directly above your right ankle. Your right thigh should be parallel to the floor, and your shin should be perpendicular.
5. Extend your arms out to the sides at shoulder height, parallel to the floor. Your palms should face down.
6. Keep your gaze focused over your right fingertips, in the direction of your right hand.
7. Lengthen your spine, engage your core, and relax your shoulders away from your ears. Keep your chest open and facing forward.
8. Press firmly into the outer edge of your left foot and ground down through your right foot for stability.
9. Hold the pose for several breaths, feeling the strength and stability in your legs and the expansion through your chest.
10. To release, straighten your right leg, turn your feet parallel to each other, and lower your arms back to your sides.
11. Repeat the same steps on the other side, stepping your right foot back and bending your left knee.
Warrior II works the quadriceps, hamstrings, and calves to strengthen and stretch them. It also stretches the hips, groin, and chest, increasing flexibility and circulation. Warrior II promotes balance, stability, and focus, as well as a sense of empowerment and grounding.
Changes can be made to accommodate varying levels of flexibility and balance. If you have trouble bending your front knee deeply, you can shorten your stance. If you are experiencing neck pain, you can choose to look straight ahead or slightly downward instead of over your front fingertips.
Remember to take deep breaths and have a steady, relaxed breath throughout the pose. Warrior II can help you gain strength, stability, and a steady determination both on and off the mat with regular practice.
Warrior III:
Warrior III, also known in Sanskrit as Virabhadrasana III, is a difficult balancing position that strengthens the entire body, particularly the legs, core, and back. It necessitates concentration, stability, and deliberate control. Warrior III is named after Hindu mythology’s formidable warrior Virabhadra, who embodies power, grace, and concentration.
Here is a step-by-step guide to performing Warrior III:
1. Begin in a standing position at the top of your mat, with your feet hip-width apart and arms by your sides.
2. Shift your weight onto your right foot and ground down through all four corners of your foot, feeling a sense of stability.
3. Engage your core muscles and find a focal point on the floor slightly ahead of you to help maintain balance.
4. Start to hinge forward at the hips, slowly lifting your left leg straight back behind you while simultaneously extending your arms forward.
5. Keep your left leg straight and parallel to the floor, engaging the muscles of your standing leg for stability.
6. Simultaneously, extend your arms forward, keeping them parallel to the floor. Your fingertips should be pointing forward, in line with your shoulders.
7. Maintain a straight line from the crown of your head to your left heel, with your body parallel to the floor.
8. Keep your gaze focused downward to help maintain balance and stability.
9. Hold the pose for several breaths, feeling the engagement and activation of the muscles in your standing leg, core, and back.
10. To release, slowly lower your left leg back to the floor, returning to a standing position with both feet firmly on the ground and arms by your sides.
11. Repeat the same steps on the other side, shifting your weight onto your left foot and lifting your right leg straight back behind you.
Warrior III works on leg strength, namely the calves, hamstrings, and quads. It also works the core muscles, such as the abdominals and lower back, to keep you balanced and stable. This pose also improves posture, increases focus and concentration, and cultivates a sense of grace and poise.
Depending on your level of balance and flexibility, you can modify the stance. For example, you can support yourself by softly resting your fingertips on a wall or a chair. You can also discover greater stability by slightly bending your standing leg.
Remember to take deep breaths and have a steady, relaxed breath throughout the pose. Warrior III can help you build strength, balance, inner peace, and focus with daily practice.
Twisting poses, also known as spinal twists or Ardha Matsyendrasana in Sanskrit, are a group of yoga poses that involve twisting the spine. These poses provide numerous benefits, including improved digestion, detoxification, spinal mobility, and the release of tension in the back, neck, and shoulders. Twisting poses can also help tone the abdominal muscles and increase flexibility in the spine.
Here are a few commonly practiced twisting poses:
1. Half Lord of the Fishes Pose (Ardha Matsyendrasana):
– Start by sitting on the floor with your legs extended in front of you.
– Bend your right knee and place your right foot on the floor, close to your left thigh.
– Bring your left foot over your right leg and place it on the floor, next to your right thigh.
– Inhale and lengthen your spine, then exhale and twist your torso to the right, placing your left elbow on the outside of your right knee.
– Hold the pose for several breaths, deepening the twist with each exhale.
– Repeat the pose on the other side by bending your left knee and twisting your torso to the left.
2. Revolved Triangle Pose (Parivrtta Trikonasana):
– Start in a standing position with your feet about hip-width apart.
– Step your left foot back, keeping it at a 45-degree angle.
– Extend your arms out to the sides at shoulder height.
– Inhale and lengthen your spine, then exhale and hinge forward at the hips, placing your right hand on the outside of your left foot or on a block.
– Twist your torso to the left, reaching your left arm toward the ceiling.
– Hold the pose for several breaths, deepening the twist with each exhale.
– Repeat the pose on the other side by stepping your right foot back and twisting your torso to the right.
3. Seated Spinal Twist (Marichyasana):
– Start by sitting on the floor with your legs extended in front of you.
– Bend your right knee and place your right foot on the floor, close to your left thigh.
– Keep your left leg extended and flex your left foot.
– Inhale and lengthen your spine, then exhale and twist your torso to the right, placing your left elbow on the outside of your right knee.
– Hold the pose for several breaths, deepening the twist with each exhale.
– Repeat the pose on the other side by bending your left knee and twisting your torso to the left.
Remember to approach twisting poses with caution and listen to your body. It’s important to avoid forcing the twist and to maintain a lengthened spine throughout the pose. If you have any pre-existing back or spine conditions, it’s always best to consult with a qualified yoga teacher or healthcare professional before practicing twisting poses.
Backbends, such as Ustrasana (Camel Pose) and Bhujangasana (Cobra Pose), are yoga poses that involve arching the spine backward. These poses stretch and strengthen the muscles in the back, open up the chest and shoulders, and increase flexibility in the spine. They also stimulate the nervous system and can help improve posture and relieve tension in the upper body.
Here’s a description of Ustrasana and Bhujangasana:
1. Ustrasana (Camel Pose):
– Start by kneeling on the floor with your knees hip-width apart.
– Place your hands on your lower back, fingers pointing down.
– Inhale and engage your core as you gently press your hips forward.
– Exhale and lean back, keeping your hands on your lower back for support.
– Continue to press your hips forward, allowing your spine to gently arch backward.
– If comfortable, reach your hands back one at a time to hold onto your heels. Keep your neck relaxed and gaze upward or slightly backward.
– Hold the pose for several breaths, feeling the stretch in your chest, shoulders, and thighs.
– To release, bring your hands back to your lower back and slowly come up to a kneeling position.
2. Bhujangasana (Cobra Pose):
– Start by lying face down on the mat, legs together, and the tops of the feet pressing into the floor.
– Place your hands on the mat, slightly below your shoulders, fingers pointing forward.
– Inhale and press your palms into the mat, straightening your arms, and lift your chest off the ground. Keep your elbows close to your sides.
– Engage your back muscles and lift your gaze upward, lengthening your neck.
– Keep your lower body relaxed and grounded, with the tops of your feet pressing into the mat.
– Hold the pose for several breaths, feeling the stretch in your spine, chest, and abdomen.
– To release, exhale, and slowly lower your chest and forehead back down to the mat.
Backbends can be modified to suit your level of flexibility and comfort. If you’re new to backbends, you can start with gentle variations and gradually increase the intensity over time. It’s important to listen to your body, move slowly, and avoid any pain or discomfort. If you have any pre-existing back or spine conditions, it’s recommended to consult with a qualified yoga teacher or healthcare professional before practicing backbends.
Forward folds, such as Uttanasana (Standing Forward Fold) and Paschimottanasana (Seated Forward Bend), are yoga poses that involve folding the upper body forward, lengthening the spine, and stretching the hamstrings and lower back. These poses promote relaxation, release tension, and help calm the mind. Forward folds also stimulate the digestive system and can improve flexibility in the posterior chain of the body.
Here’s a description of Uttanasana and Paschimottanasana:
1. Uttanasana (Standing Forward Fold):
– Start by standing tall with your feet hip-width apart.
– Inhale and lift your arms overhead, lengthening your spine.
– Exhale and hinge forward at the hips, bending your knees slightly if needed.
– Allow your upper body to fold over your legs, bringing your hands towards the floor or resting them on your shins, ankles, or blocks.
– Relax your neck and let your head hang heavy.
– If comfortable, straighten your legs and deepen the stretch in your hamstrings.
– Hold the pose for several breaths, feeling the release in your back, hamstrings, and calves.
– To come out of the pose, bend your knees slightly, engage your core, and slowly roll up to a standing position, stacking one vertebra at a time.
2. Paschimottanasana (Seated Forward Bend):
– Start by sitting on the floor with your legs extended in front of you.
– Inhale and lengthen your spine, sitting up tall.
– Exhale and hinge forward at the hips, leading with your chest.
– Reach your hands toward your feet, ankles, or shins. If needed, you can use a strap around your feet to help with the stretch.
– Keep your spine long and avoid rounding your back as you fold forward.
– If comfortable, relax your neck and let your head hang.
– Hold the pose for several breaths, feeling the stretch along the back of your legs and the release in your lower back.
– To release, inhale and slowly lift your torso back up to a seated position.
Forward folds can be modified to suit your level of flexibility and comfort. If you have tight hamstrings or lower back issues, you can use props like blocks or straps to support your practice and gradually work towards deeper stretches over time. Remember to breathe deeply and relax into the pose, avoiding any pain or discomfort. As always, listen to your body and honor its limits.
Pranayama (Breathing Techniques) for Weight Loss:
In addition to the physical poses, incorporating pranayama, or breathing techniques, can enhance weight loss efforts. Two effective techniques are:
Kapalabhati, also known as Skull Shining Breath, is a yoga pranayama (breathing) method that consists of strong exhales and gentle inhales. It is a revitalizing and cleaning breath that aids in the clearing of the mind, increasing oxygen intake, and stimulating the abdominal muscles and digestive system.
Here’s a step-by-step guide to practicing Kapalabhati:
1. Find a comfortable seated position, either on the floor or on a chair, with your spine upright and shoulders relaxed.
2. Take a few deep breaths to center yourself and prepare for the practice.
3. Begin by taking a deep inhalation through your nose, filling your lungs completely.
4. Exhale forcefully and quickly through your nose, contracting your abdominal muscles to push the breath out. The exhalation should be short and powerful.
5. Allow the inhalation to happen passively, without effort, as your abdominal muscles relax.
6. Repeat this forceful exhalation and passive inhalation rhythm, focusing on the rapid movement of your diaphragm and abdomen.
7. Start with a slow pace, gradually increasing the speed of the exhalations while maintaining a steady rhythm.
8. Aim to perform around 20–30 rounds of Kapalabhati breaths, or adjust the duration based on your comfort level and experience.
9. After completing the rounds, take a few deep breaths to return to your normal breathing pattern and observe the effects of the practice.
The emphasis during Kapalabhati is on strong exhalation, which aids in the removal of stale air and pollutants from the lungs, while passive inhalation allows new air to flow spontaneously. It should be noted that Kapalabhati is a forceful breath that may not be ideal for everyone, particularly those with high blood pressure, heart disorders, or respiratory issues. Before performing Kapalabhati, it is best to contact with a skilled yoga teacher or healthcare practitioner if you have any concerns or medical issues.
Remember to practice Kapalabhati mindfully and progressively increasing the intensity and length over time. It is also critical to pay attention to your body and stop if you experience any discomfort or dizziness. Kapalabhati can assist increase vitality, improve focus, and generate a sense of clarity and rejuvenation with daily practice.
Bhastrika, also known as Bellows Breath, is a vigorous yoga pranayama (breathing) method that entails forceful inhales and exhales. It is a vigorous and invigorating breath that aids in increasing oxygen intake, producing heat in the body, and stimulating the nervous system. Bhastrika is frequently used to increase energy, improve focus, and stimulate overall bodily function.
Here’s a step-by-step guide to practicing Bhastrika:
1. Find a comfortable seated position, either on the floor or on a chair, with your spine upright and shoulders relaxed.
2. Take a few deep breaths to center yourself and prepare for the practice.
3. Begin by taking a deep inhalation through your nose, filling your lungs completely.
4. Exhale forcefully and quickly through your nose, using your diaphragm to expel the breath. The exhalation should be active, powerful, and audible.
5. Inhale forcefully and deeply through your nose, expanding your lungs fully.
6. Repeat this forceful inhalation and exhalation rhythm, focusing on the rapid movement of your diaphragm and the sensation of the breath.
7. Start with a slow pace, gradually increasing the speed and intensity of the breath while maintaining a steady rhythm.
8. Aim to perform around 20–30 rounds of Bhastrika breaths, or adjust the duration based on your comfort level and experience.
9. After completing the rounds, take a few deep breaths to return to your normal breathing pattern and observe the effects of the practice.
The emphasis during Bhastrika is on the strong inhales and exhales that create a pumping action in the belly and chest. This breath boosts oxygen supply, generates heat in the body, and stimulates the entire respiratory system. It is crucial to remember that Bhastrika is a powerful breath and may not be appropriate for everyone, particularly those with high blood pressure, heart disorders, or respiratory issues. Before practicing Bhastrika, it is recommended to contact with a skilled yoga teacher or healthcare expert if you have any concerns or medical issues.
Remember to perform Bhastrika mindfully and progressively increasing the intensity and duration over time. It is also critical to pay attention to your body and stop if you experience any discomfort or dizziness. Bhastrika can help boost energy levels, increase mental clarity, and awaken the body’s vital vitality with frequent practice.
Incorporating Yoga into a Weight Loss Routine:

Consistency is essential for making yoga an effective element of your weight-loss quest. Set attainable goals and keep track of your progress.
For a well-rounded regimen, consider combining yoga with other forms of exercise such as cardio or strength training.
Weight Loss and the Mind-Body Connection:
Yoga is more than just physical exercise; it promotes mindfulness and lowers emotional eating. Yoga helps you become more aware of your body’s demands and learn to make healthy choices. Yoga also aids in the management of stress, which is frequently a trigger for overeating or unhealthy habits.
Yoga can help you lose weight and improve your overall health. You can experience the physical and mental advantages of yoga while working towards your weight-loss goals by including the following positions and practices into your regimen. Remember that yoga is a journey, so be patient and enjoy it. Begin your yoga practice today and see the great effects it has on your body and mind.
Begin your yoga journey to learn about the transformative effects it can have on your weight loss attempts.
Yes, yoga can be an excellent weight loss method. While yoga might not burn as many calories as high-intensity workouts, it does assist to build lean muscle, enhance metabolism, and promote mindful eating, all of which can aid with weight loss over time.
Yoga forms that are dynamic and physically demanding, such as Power Yoga, Vinyasa Flow, and Ashtanga Yoga, can be very useful for weight loss. These methods involve continuous movement and strength-building positions, which aid in the burning of calories and the development of lean muscle.
Consistency is essential. To have the best effects, practice yoga at least 3-4 times per week. For a well-rounded fitness program, combine your yoga practice with other forms of exercise.
Yes, certain yoga poses can be especially useful for losing weight. Sun Salutations, Warrior Poses, Twisting Poses, Backbends, and Forward Folds are all poses that serve to develop strength, flexibility, and burn calories.
Yoga for Weight Loss: Effective Poses and Practices – Yoga is a holistic activity that promotes both physical and mental and emotional wellbeing. It promotes relaxation, decreases stress, improves sleep, increases bodily awareness, and creates a healthy relationship with oneself, all of which lead to an overall better quality of life.